Showing posts with label crafty. Show all posts

Wednesday, February 20, 2013

Self-promotion

So Marvel is doing a collaboration with Vans sneakers, which is awesome...except there are zero female characters on any of the shoes. As the proud owner of Wonder Woman Converse All-Stars, I think this is bullshit. (Side note: They have BatgirlCatwoman, and Poison Ivy too! Wow, DC did something right. I have to pause for a minute to process that.)

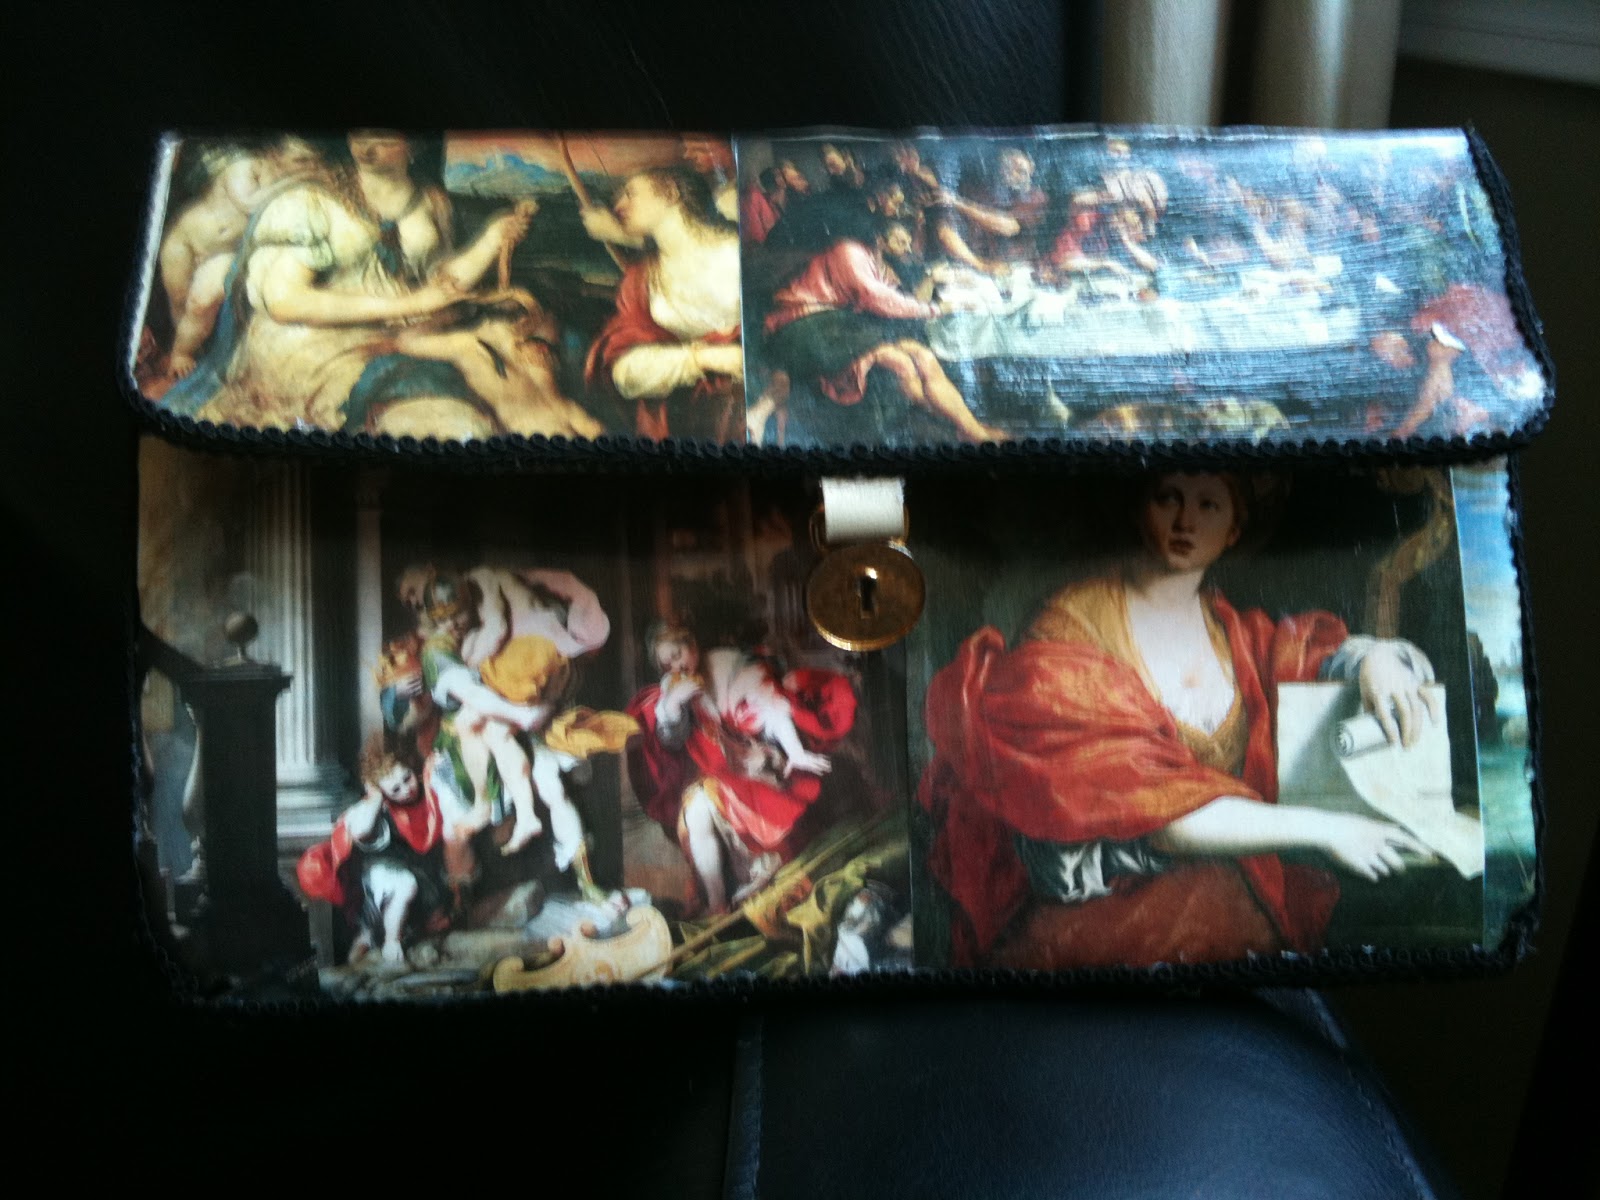
Anyway, Marvel's marketing misogyny is my business opportunity. I make decoupage shoes from comic books. I also make boots:


And purses:


So, if you would like your favorite comic lady (or anyone/anything, really!) on an accessory of your choice, leave me a comment or ping me on Twitter.

Details:

I have a wonderful thrift shop near my house that keeps me in cute, cheap purses and wallets, so if you're interested in one of those, I can send you pictures of what I have on hand.

For shoes (and if you have a purse of your own you'd like to use), I ask that you send me a pair. You can either send me the comics/materials for the decoupage or tell me what you're looking for and let me track it down.

Prices:

Wallet: $30
Shoes/Purse: $50
Boots: $80

Important Note: Decoupage leaves shoes/purses pretty stiff and prone to cracking with repeated use, so none of these are great for everyday use. But they're excellent special occasion conversation pieces!


Monday, June 4, 2012

Slayer Shoes

Previously in Geek Shoes.

The lovely Mel asked me to transform a pair of pumps into slayer shoes. She sent me the shoes and a TPB of Fray and I got to work (as soon as I finished reading it, that is).


Everything went faster this time because I knew I needed:

1) 4 long panels with visual interest for the sides.
2) 4 kick-ass close-ups for the heels and toes
3) A selection of smaller rectangular shots for the in-between spots
4) Some tiny pictures for the inevitable gaps

So I marked illustrations I liked as I read and picked ones to cut out only after checking to see if they'd fit on the shoe.


Then I decided to get faaaancy and layer pictures:


The goal is for you not to be able to tell, but this shot is three separate illustrations: The shot with the tattoo is the bottom, with the picture of Fray with her arm out and the red blade layered over it.


I was really happy with the results.


And Mel was happy too, which was the best part!


A couple of people have asked, so:

To get your own geek shoes, just send me the shoes and comic of your choice. My jar of Mod Podge and I will do the rest!

Thursday, February 23, 2012

A perfect storm of NERD


I originally thought this would be a crafts blog. This plan was derailed early on when I realized that I am, in fact, AWFUL at crafting. I'm impatient, messy, uncoordinated, and clumsy.

I still almost made this a crafts blog. Names I considered include:

DIY Reject
To What Has Daisy Glued Her Hand This Week?
Crafting for the Incompetent
"It Only Took 30 Minutes!" My Ass


Because regardless of my incompetence, I really like crafting. I like taking junky, unused stuff and turning it into something pretty and at least nominally useful. I love watching a crazy idea become greater than the sum of its parts. It's a visceral sense of accomplishment that adulthood doesn't often provide.

I'd been looking for cool geek shoes since I found these boots while trawling tumblr for Avengers info (Hot guys, Joss, and shit blowing up. Can I get in line now?). I din't like the execution (Sneakers should not have heels.), but I liked the theory. Apparently the universe wanted me to have geek kicks, because The Hairpin promptly linked to some badass decoupaged heels.

They looked easy enough (famous last words!), but I didn't have any comics, so my friend Kristen and I negotiated a trade: she'd brave the comic book store and send comics for herself and me, and I'd make shoes for her too. I ended up tackling her shoes first because, well, it turns out that in the comics Captain America doesn't look like this; he looks like a sack of potatoes wrapped in a flag. So I need to rethink my concept.

Anyway. Kristen sent me four Mass Effect comics. I know absolutely nothing about ME, but Mr. Razor is a fanboy and pointed out the cool stuff for me.


Shoe one was a near-disaster. Non-pro tip: If you've never decoupaged anything in your life, don't start with a curving, uneven, moveable surface. There were glued fingers, torn papers, and copious cursing.


Shoe two went a whole lot faster. Here's what I learned between the left pump and the right: choose large images. You'll have fewer edges and fewer weird tiny gaps. (Weird tiny gaps, however, are easily covered by onomatopoeia text.) Plus, big images show up better when people look down at the shoes on your feet. Cut the images as close to the shape of the shoe as you can to avoid creasing. Then resign yourself to some creasing at the heel anyway. That curve is freaking impossible.


Materials: Sensible pumps ($6 slightly used at Boomerangs), 4 comic books, mod podge, small paint brush, and acrylic sealer

Method: Cut out your pictures, slap some mod podge on those suckers, wait for them to get a little bit damp so they'll bend better to the shoe, then slap 'em on, When you have the whole thing covered, do 3 or 4 coats of mod podge over the shoes (waiting about a half an hour or more between coats), then wait a day and spray the sealer over them in a well-ventilated area.

Time: About an hour if you know what you're doing. Probably closer to three if you read this and are going, "What's mod podge?" But, as I think I've proved, still totally doable for a newbie!

Or, you know, you could send me some shoes and comics and I could do them for you for a nominal fee. Just sayin'.

Friday, April 1, 2011

Odds & Ends


Big-ass china cabinet at West Roxbury Boomerangs, just $100! It needs to be painted, but it's in great shape. The velvet couch must've found a home, because it's been gone for a couple of weeks.


The chair whose cushion led to the destruction of my lamp. I got up the courage to go back to the project, but I think my father-in-law's staple gun is from 1974 and the kickback was so bad I was afraid I'd destroy something else, so it's on hold again.


Finished cork boards from remedial home ec. It was easy to pull the fabric off of the upside down one and reglue it. The glue gun has also come in handy in fixing Baby Razor's environmentally-friendly, made-with-love wooden toys, which are falling apart. I guess love is a crap adhesive.

In case you're keeping track: glue gun=success. Staples/staple gun=mayhem.

A song I love from my Baby Razor's favorite kids' show:


And finally, Baby Razor is all set for Red Sox Opening Day:

Friday, March 25, 2011

Don't Stand So Close To Me (Really, You Could Get Hurt)


(Because there was no Little Miss Clumsy)

I am clumsy. Butterfingered. A total spazz. I injure myself and destroy things in ways that defy physics and logic. Plates jump to their death from my hands. I hit my head on picture frames I could swear I'm nowhere near. I once gave myself a hematoma while dismounting a stationary bike. (When I tried to explain the gigantic bruise to my doctor at my physical, she paused then asked me how safe I felt with my husband. Yup.)

I've always been a nexus of stupid accidents, but I hoped I would outgrow it. My family thought I was just spacey, and I believed that theory enough to think that as a functioning adult and mother, I'd be less disaster-prone. But I have finally acknowledged that ridiculous things are always going to happen to me. Now I just need to figure out the best way to minimize the damage.

I'm bringing all this up thanks to my most recent disaster. Keep in mind that this story is going to sound completely improbable to you, a non-clumsy person. To me? It's pretty typical of a Saturday afternoon.

Recently, I bought a couple of chairs for $12 apiece that were in perfect condition except for a stain on each seat cushion. So I decided I'd take another turn as DIY-girl and re-cover the cushions. The internet assured me that this would be a piece of cake. All I needed was a screwdriver, new fabric, and a staple gun.

Having procured a replaceable-head screwdriver from our tool kit, I began yanking approximately eight hundred staples out of the bottom of the existing cushion. On the second-to-last staple, the pin holding the screwdriver head in place went ping and bounced off into the ether. Of course, instead of making it to the floor, it ended up in the depths of my armchair.

After taking the cushion off, I realized that the tiny ball-bearing had, in fact, rolled all the way down into the netting below the chair. I sighed and thought about putting everything away and waiting until Mr. Razor got home to help me. But he was out with the baby and I didn't want to greet him with, "Please pick up this large, heavy object. Oh, also, I broke the screwdriver." Plus, there were only two staples left, and I get psychotic about finishing projects once I've started them. If I didn't find the pin, there was a good chance I'd end up picking those staples out with my teeth.

So I poked around and realized that there was a hole in the netting near the front of the chair. Perfect. I'd just tip the chair forward and the ball would roll out, where I could recover it, fix the screwdriver, and finish my project without anyone ever knowing about my latest mishap.

Except when I tipped the chair, it hit the floor lamp next to it, which then crashed to the floor before I could drop the armchair to catch it, shattering its glass shade and eco-friendly lightbulb. Sigh. I spent the next hour carefully removing shards of glass from the corner of the living room. I never got back to the screwdriver or the last two staples.

To sum up: In my attempt to save some money on decorating, I destroyed a screwdriver and a large lamp, whose replacement cost completely cancelled out my bargain. From now on, I will be limiting my craft projects to ones involving finger paint and pipe cleaners.

Sunday, March 13, 2011

Remedial Home Ec

I found a pretty fabric remnant at Boomerangs last weekend and stood staring at it until I thought of something I could do with it. I have two magnetic/tack boards on which I hang my scarves and necklaces. They look like this:


I decided I'd cover them with the fabric. Here is the remnant, with bonus cat:


(I sincerely apologize for the [lack of] photo quality. I did this project as Mr. Razor entertained the baby and had to rush. Also, I'm a crap photographer.)

I cut the fabric so that the crest was centered over the board, then broke out my brand new hot glue gun. Despite having absolutely no idea what I was doing (Unlike many modern appliances, glue gun instructions are extremely simple: "Insert glue stick. Plug in. Pull trigger. Try not to glue yourself to anything."), I successfully attached the fabric to the board and only got glue on five of my fingers. Here's the finished product:


Looks good, doesn't it? I took that picture and thought that I'd make this post about how if someone with minimal crafting skills like me can make something this pretty, anyone can!

Then I turned it over.

And noticed that the board's hooks were on the bottom. Yup: I glued the crest on upside down. I'm not sure what I'll do with it now: either glue a new hook on or just rest it on my dresser instead of hanging it. It's not ruined by any means, but it is proof that, sadly, just owning a glue gun does not automatically turn one into Martha Stewart.